
EASY Banana Pudding Cake Jars with Fresh Strawberries
- Yield: 12-24 servings
Description
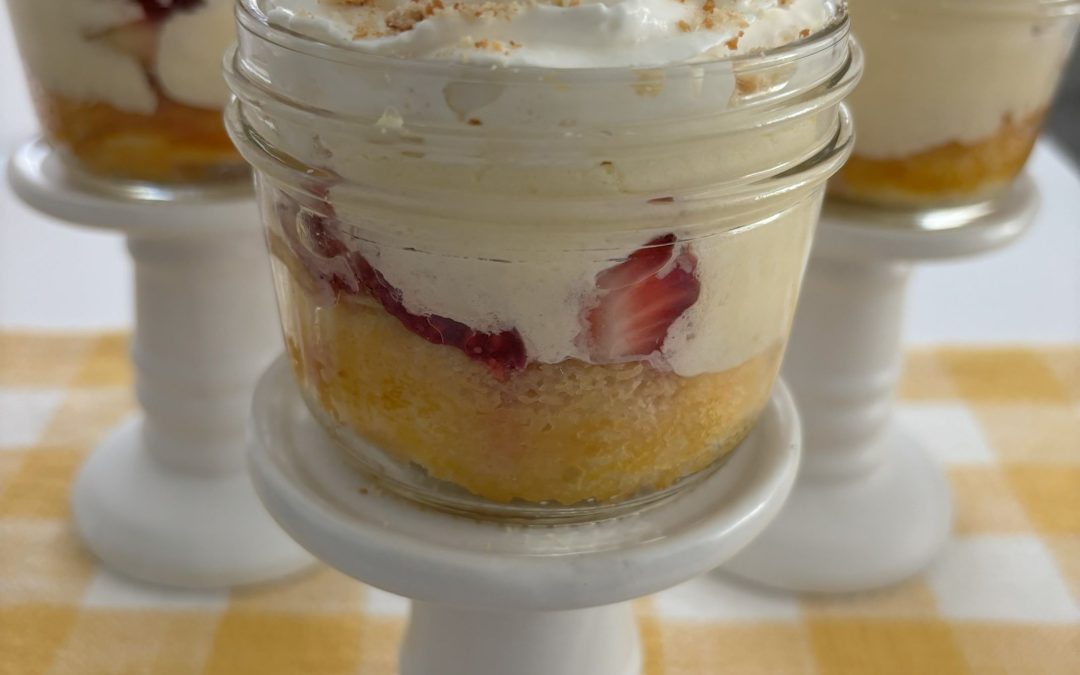
These easy, no-bake banana pudding cake jars featuring a surprise layer of fresh strawberries are made by layering pre-made, store bought dessert cake shells in jars with sliced bananas, fresh strawberries and covered in a delicious pudding mixture. Garnish with crushed vanilla wafers for that traditional banana pudding taste. It is a definite crowd pleaser and perfect for summer festivities. These can be made one day in advance, and they actually keep longer than banana pudding made in a pan because they are individually packaged in airtight jars. Simple to make in advance, a delicious spin on traditional banana pudding, and they make a beautiful presentation for your gathering!
Don’t have jars? Do not fret! Just read the notes for a variety of alternatives to enjoying this simple dessert!
Ingredients
- 24 pre-made dessert shells (or 12 - SEE NOTES)
- 7-8 medium bananas, peeled and sliced
- 1-2 tablespoon lemon juice (optional)
- 1 pound (16-ounce container) fresh strawberries, chopped
- 1 14 ounce can sweetened condensed milk
- 1 8-ounce tub of Cool Whip, thawed
- 2 cups cold milk
- 2 teaspoons vanilla extract
- 1 large box (5.1 oz) INSTANT vanilla pudding
- Reddi-wip Whipped Cream Topping (optional)
- 1 cup Vanilla Wafers (crushed) for garnish
- Wide Mouth Mason Jars (24 - 8-ounce OR 12 - 16-ounce) SEE NOTES for alternatives
- Large mixing bowl
- Hand mixer or stand mixer
Instructions
- Place one dessert shell at the bottom of each jar. (24 small 8-oz. jars or 12 large 16-oz. jars). SEE NOTES if you would like to make only 12 small jars or 6 large jars.
- Peel and slice bananas into circles and toss in a large bowl with 1-2 tablespoons of lemon juice to help minimize browning. Set it aside.
- In a large bowl using a handheld mixer or stand mixer, mix sweetened condensed milk, thawed Cool Whip, milk, and vanilla extract until smooth. The instant pudding will be added LATER.
- Layer approximately 5-6 banana slices in the center of each dessert shell.
- Layer approximately 1 1/2- 2 tablespoons of chopped strawberries over the bananas and spread some pieces to the outer edge of the jar to be visible.
- Gently beat pudding mixture again, then slowly add the box of instant pudding to the mixture and beat until smooth (about 1-2 minutes).
- Using a mini ladle or measuring cup, pour 1/4 to 1/3 cup of pudding over the bananas and strawberries. Be sure to try to cover the bananas with pudding.
- If making 12 large jars, repeat the layering process with a 2nd dessert shell, bananas, strawberries, then more pudding.
- Close each jar with airtight lids and store in the refrigerator for at least 2 hours.
- When ready to serve, remove lids and sprinkle crushed vanilla wafers on top. You may also pipe a fluffy dollop of Reddi-Wip whipped topping over the wafers and another sprinkling of crushed vanilla wafers to finish.
- Leftover jars should be stored in the refrigerator and eaten within 2-3 days.
Notes
- Want to make less servings? You may opt to make only 12 small jars or 6 large jars and use the extra pudding mixture as a fruit dip. Adjust the amount of the bananas and strawberries to half. Let the extra pudding mixture thicken in the refrigerator in a covered bowl. When ready to use, transfer to a serving dip bowl and place it in the center of a platter with strawberries, sliced apples, graham crackers, pretzels, etc. It’s absolutely delicious and perfect as a dip!
- Make ahead – You can make and assemble jars no more than one day in advance. Be sure jars are sealed tight with lids and stored in the refrigerator.
- Wide mouth Mason Jars – be sure to purchase wide mouth jars as it is easier to insert the whole dessert shell. I found my wide mouth jars at Walmart. They also have them on Amazon and usually at most grocery stores.
- Don’t have Wide mouth Mason Jars? If you do not have wide mouth jars, you can cut the dessert shells into 4 cubes to place in the bottom of a jar with a regular opening OR you can use any 8 or 9 oz clear plastic or glass dessert cup.
- Using cups instead of jars – If you do not have jars and plan to use cups without lids, I recommend making the dessert cups the same day you plan to serve them since they can’t be stored in an airtight jar. You can place them in the fridge – just be careful of smells from other foods if your cups are not covered. If you have a large container with a lid that can fit all the cups, that might work. You could also cover each cup with Glad Press n Seal.
- Dessert shells – these are found in the produce section of the grocery store, usually near the strawberries. If you cannot find these, you can use homemade or store-bought pound cake, which are usually packaged in a 12-ounce loaf. Simply slice and cut the cake into 1-inch cubes (about 4-6 cubes per small jar). I have not tried this method, so I am not 100% certain how much cake you will need. But based on my calculations of the size of a dessert shell, 2 – 12 oz store-bought pound cakes should be enough to make 24 small jars OR 12 large jars.
- Sweetened condensed milk – This is NOT the same as evaporated milk. Please be sure to use sweetened condensed milk.
- Instant Pudding – Do not follow the instructions on the package. The dry instant pudding is added to the pudding mixture in the last step because it will begin to thicken up pretty quickly and make it more difficult to pour in the jars. You want the mixture to be nice and pourable so it can easily cover the bananas. Then it will thicken as it chills in the refrigerator.
- Pudding flavor – You may use vanilla, French vanilla or banana cream. I prefer vanilla, but if you like a very strong banana taste, you may use banana cream.
- Banana layer – Make sure the bananas are covered with pudding. Try to layer the banana slices in the center of the shell so they are not visible through the jar once they turn brown. They are still edible when brown, just not pretty to look at 😊. Covering will slow the browning and keep them from being visible.
- Crushed Vanilla Wafers – If you want your wafers to stay a bit crunchy, wait until ready to serve to top with crushed wafers. Otherwise, the cookies will get soft in the refrigerator. However, they will still look nice. If you are short on time, go ahead and top them in advance. Just know they will not be crunchy when served. And that’s ok too. You can also leave a small bowl of crushed Vanilla Wafers on the dessert table so guests may help themselves.
- Storage – keep cake jars refrigerated and closed tight until ready to serve. For best quality, serve to guests within one day, but leftover jars may be stored in the refrigerator and eaten within 2-3 days.
- Category: Desserts
- Method: No bake
- Cuisine: American